opcache-gui
A clean and responsive interface for Zend OPcache information, showing statistics, settings and cached files, and providing a real-time update for the information.
This interface uses ReactJS and Axios and is for modern browsers, and requires a minimum of PHP 7.1.
License
MIT: http://acollington.mit-license.org/
Sponsoring this work
If you're able and would like to sponsor this work in some way, then that would be super awesome ❤️. You can do that through the GitHub Sponsorship page.
Alternatively, if you'd just like to give me a shout-out on X (aka, Twitter) to say you use it, then that'd be awesome, too! (Any one else miss postcardware?)
Using the opcache-gui
Installing
There are two ways to getting started using this gui:
Copy/clone this repo
The easiest way to start using the opcache-gui is to clone this repo, or simply copy/paste/download the index.php file to a location which your web server can load. Then point your browser to that location, such as https://www.example.com/opcache/index.php.
Install via composer
You can include the files with Composer by running the command composer require amnuts/opcache-gui.
Once in your vendor directory, there are numerous ways in which you can use the interface. For example, if you're using a framework such as Symfony or Laravel, you could load opcache-gui into a Controller. Your requirements of setting it up within your framework of choice will vary, so it's not really possible to detail how to do that within this readme... but I have faith in your ability to figure it out!
The namespace used for the class is AmnutsOpcache, so once the dependency is in your autoload.php you can use the AmnutsOpcacheService class. For example, you could do something like:
<?php use AmnutsOpcacheService; // assuming location of: /var/www/html/opcache.php require_once __DIR__ . '/../vendor/autoload.php'; // specify any options you want different from the defaults, if any $options = [/* ... */]; // setup the class and pass in your options, if you have any $opcache = (new Service($options))->handle();
Then you can create whatever view you want with which to show the opcache details. Although there is a pretty neat React-based interface available for you in this repo.
Alternatively, include vendor/amnuts/opcache-gui/index.php directly and this'll give you the same result as just copying/pasting the index.php somewhere.
<?php // assuming location of: /var/www/html/opcache.php require_once __DIR__ . '/../vendor/amnuts/opcache-gui/index.php';
You could even simply create a symlink to the index.php that's in the vendor directory:
ln -s /var/www/vendor/amnuts/opcache-gui/index.php /var/www/html/opcache.php
Basically, there are plenty of ways to get the interface up and running - pick whichever suits your needs.
Configuration
The default configuration for the interface looks like this:
$options = [ 'allow_filelist' => true, // show/hide the files tab 'allow_invalidate' => true, // give a link to invalidate files 'allow_reset' => true, // give option to reset the whole cache 'allow_realtime' => true, // give option to enable/disable real-time updates 'refresh_time' => 5, // how often the data will refresh, in seconds 'size_precision' => 2, // Digits after decimal point 'size_space' => false, // have '1MB' or '1 MB' when showing sizes 'charts' => true, // show gauge chart or just big numbers 'debounce_rate' => 250, // milliseconds after key press to send keyup event when filtering 'per_page' => 200, // How many results per page to show in the file list, false for no pagination 'cookie_name' => 'opcachegui', // name of cookie 'cookie_ttl' => 365, // days to store cookie 'datetime_format' => 'D, d M Y H:i:s O', // Show datetime in this format 'highlight' => [ 'memory' => true, // show the memory chart/big number 'hits' => true, // show the hit rate chart/big number 'keys' => true, // show the keys used chart/big number 'jit' => true // show the jit buffer chart/big number ], // json structure of all text strings used, or null for default 'language_pack' => null ];
If you want to change any of the defaults, you can pass in just the ones you want to change if you're happy to keep the rest as-is. Just alter the array at the top of the index.php script (or pass in the array differently to the Service class).
For example, the following would change only the allow_reset and refresh_time values but keep everything else as the default:
$opcache = (new Service([ 'refresh_time' => 2, 'allow_reset' => false ]))->handle();
Or this example to give the tabs a slightly more "piratey" feel:
$opcache = (new Service([ 'language_pack' => <<<EOJSON { "Overview": "Crows nest", "Cached": "Thar Booty", "Ignored": "The Black Spot", "Preloaded": "Ready an' waitin', Cap'n", "Reset cache": "Be gone, yer scurvy dogs!", "Enable real-time update": "Keep a weathered eye", "Disable real-time update": "Avert yer eyes, sea dog!" } EOJSON ]))->handle();
The interface
Overview
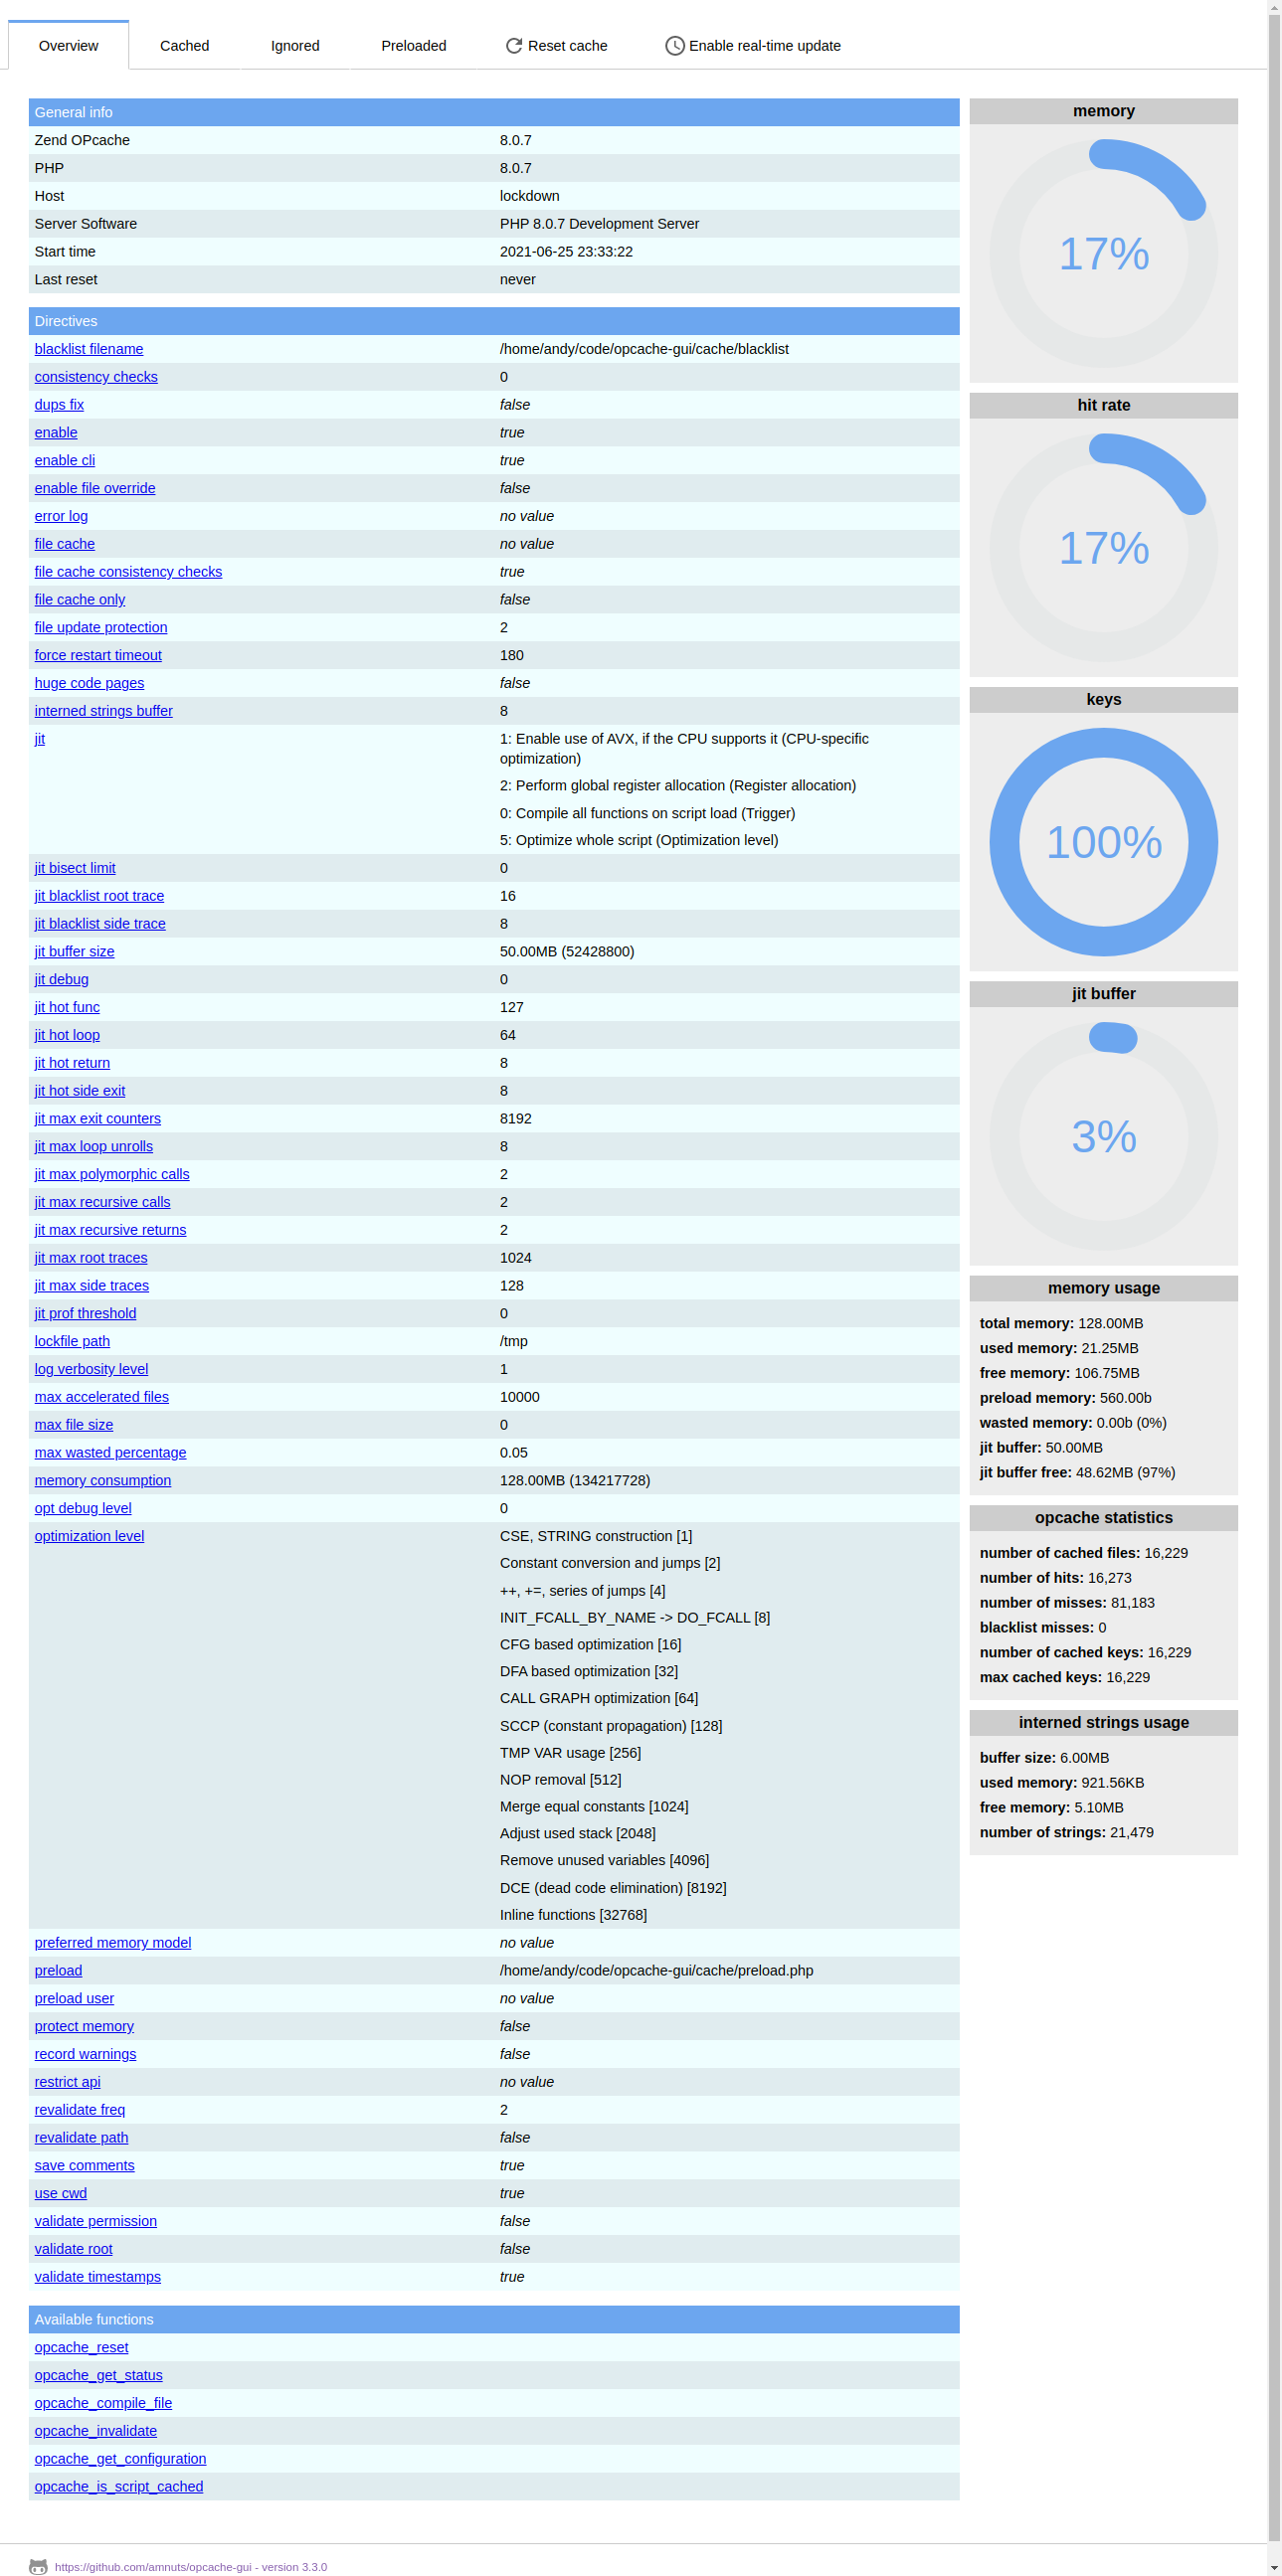
The overview will show you all the core information. From here you'll be able to see what host and platform you're running on, what version of OPcache you're using, when it was last reset, the functions and directives available (with links to the php.net manual), and all the statistics associated with the OPcache (number of hits, memory used, free and wasted memory, and more).
Cached files
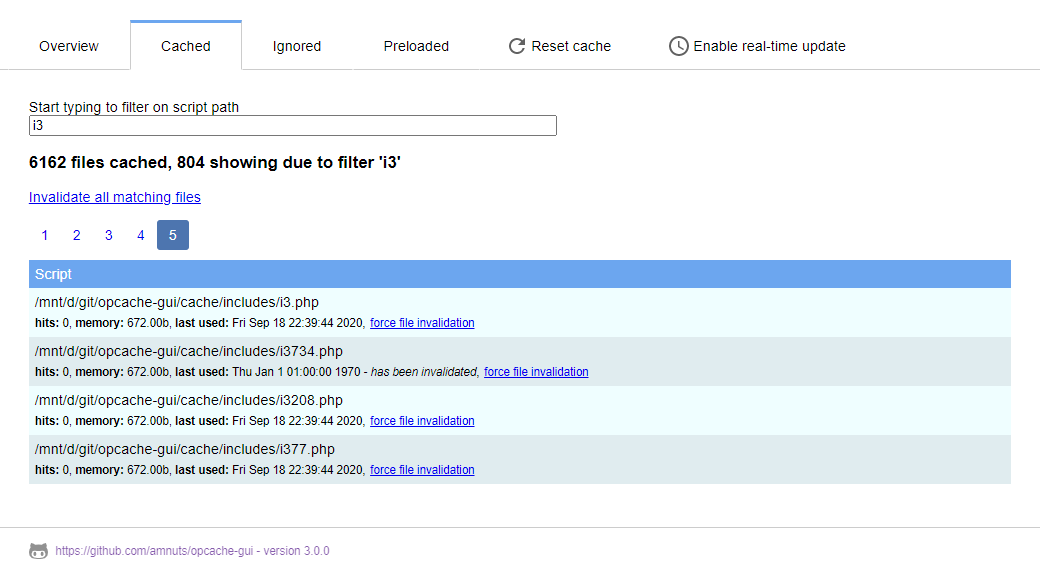
All the files currently in the cache are listed here with their associated statistics.
You can filter the results to help find the particular scripts you're looking for and change the way cached files are sorted. From here you can invalidate the cache for individual files or invalidate the cache for all the files matching your search.
If you do not want to show the file list at all then you can use the allow_filelist configuration option; setting it to false will suppress the file list altogether.
If you want to adjust the pagination length you can do so with the per_page configuration option.
Ignored files
If you have set up a list of files which you don't want cache by supplying an opcache.blacklist_filename value, then the list of files will be listed within this tab.
If you have not supplied that configuration option in the php.ini file then this tab will not be displayed. If you set the allow_filelist configuration option to false then this tab will not be displayed irrespective of your ini setting.
Preloaded files
PHP 7.4 introduced the ability to pre-load a set of files on server start by way of the opcache.preload setting in your php.ini file. If you have set that up then the list of files specifically pre-loaded will be listed within this tab.
As with the ignored file, if you have not supplied the ini setting, or the allow_filelist configuration option is false, then this tab will not be displayed.
Reset the cache
You can reset the whole cache as well as force individual files, or groups of files, to become invalidated so that they will be cached again.
Resetting can be disabled with the use of the configuration options allow_reset and allow_invalidate.
Real-time updates
The interface can poll every so often to get a fresh look at the opcache. You can change how often this happens with the configuration option refresh_time, which is in seconds.
When the real-time updates are active, the interface will automatically update all the values as needed.
Also, if you choose to invalidate any files or reset the cache it will do this without reloading the page, so the search term you've entered, or the page to which you've navigated do not get reset. If the real-time update is not on then the page will reload on any invalidation usage.
Building it yourself
The interface has been designed around the principle of having just one file that anyone needs in order to get up and running. To fulfil this, there's a template file, language files, jsx and css, which are all used in order to create the interface and they're brought together in the build process.
This build process will allow you to change the language used, how the required 3rd-party javascript libraries are included, the look and feel, or even the core components, should you wish.
The build command
To run the build process, run the command php ./build/build.php from the repo root (you will need nodejs and npm already installed). Once running, you should see the output something like:
版权声明:
1、该文章(资料)来源于互联网公开信息,我方只是对该内容做点评,所分享的下载地址为原作者公开地址。2、网站不提供资料下载,如需下载请到原作者页面进行下载。
3、本站所有内容均由合作方或网友上传,本站不对文档的完整性、权威性及其观点立场正确性做任何保证或承诺!文档内容仅供研究参考学习用!
4、如文档内容存在违规,或者侵犯商业秘密、侵犯著作权等,请点击“违规举报”。